The Neck
Actually when it all comes down to the bottom line, it’s simply a matter of how it sounds, and how it feels as you are playing it.
The quality of the Voice, Tone, or characteristic sound emanating from the instrument is the sum of the total composition. Thus, use junky, cheaply made parts and the resulting sound is going to suffer.
Sorry, but wood is wood, a 5A Flame maple neck will not sound any better, or worse than a rather bland looking plain Maple neck. While things like Flat Sawn lumber, choice of fingerboard woods, and other things may influence the tone slightly, and slightly is the key here, they are not going to have a dramatic effect on the overall sound. Think about it, about all quality S-types sound rather like an S, and the same is true of better T-types too. Even some quite poorly made S-types and T-types still have the respective characteristic sound.
Beginning with the neck I use necks manufactured by several companies. They have been supplying professional musicians for over 25 years. While they all make superb necks, for me, as they ship them, they are only a starting blank for my additional shaping.
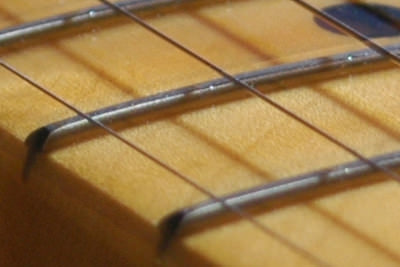
At the very least all necks receive a complete fret leveling and crowning. Why this is necessary on a new neck is discussed elsewhere on this site, but note, ALL necks made MUST have this treatment to achieve optimum playability. My thoughts are, a finished guitar that has not had the frets leveled and crowned is not finished at all.
Why do the Big Guys not do it as a matter of construction? Because it is labor intensive. Labor costs money and spending more money to build their guitars is not where the large manufacturers want to go.
After final shaping to the Musician’s specifications and the application of my Sonic Coupling modifications, it is lacqured. Generally a tinted color coat is sprayed, followed by several clear coats of Genuine Nitrocellulose lacquer. At this point any decals or other such details are added. Now about five coats of nitro are applied, and it is allowed to dry for about a week. It will be sanded, and final coats of Lacquer applied.
Now final detailing is added, the complete neck is wet sanded, the back receives what ever finish has been specified, then the appropriate parts are buffed to a high polish.

The Nut is hand cut and fit, the retainer is attached, then the keys are installed, which brings us to the keys.
Virtually all the keys used on guitars made today use plastic gears, and have been for a very long time. Have you ever found a guitar with a key that will tune the string just so far, and then it starts slipping? That’s one of the plastic gears that have given up under the strain of holding a taut string. I don’t use keys with plastic gears, nada, never, unless you want them. I’ll moan, whine and cry and let you know why I disagree, but it is a Custom guitar ya know, and you can have what you want on it.
Finally a few of my other innovations are incorporated, I’m not going to explain exactly what I do because I want the process to remain proprietary to my guitars. They are NOT found on ANY similar guitars made by the large Manufacturers, yes, not even on those built by the “Masters”. Play one of theirs, then play one of mine, and your first thought is going to be, “Well Daymmm!”, all that and more, and at half the cost.
Next: The Body